Do you know how to tighten a bike chain?
A loose bike chain can make cycling frustrating and unsafe, whether you’re commuting, riding trails, or enjoying a casual spin around the block. If you’ve been experiencing frequent chain slips or unusual sounds from your drive train, it might be time to adjust or tighten your bike chain. The good news? Tightening a bike chain is easier than you might think with the right tools and guidance.
Keeping your chain tighter is crucial to prevent it from slipping off the gears during rides.
This guide will walk you through how to tighten a bike chain step by step. Whether you own a single speed bike, a fixed gear bike, or one equipped with a rear derailleur, tightening the chain can be done at home without having to visit a bike shop. Plus, keeping your chain well-maintained increases chain tension, enhances performance, and ensures a safer ride.
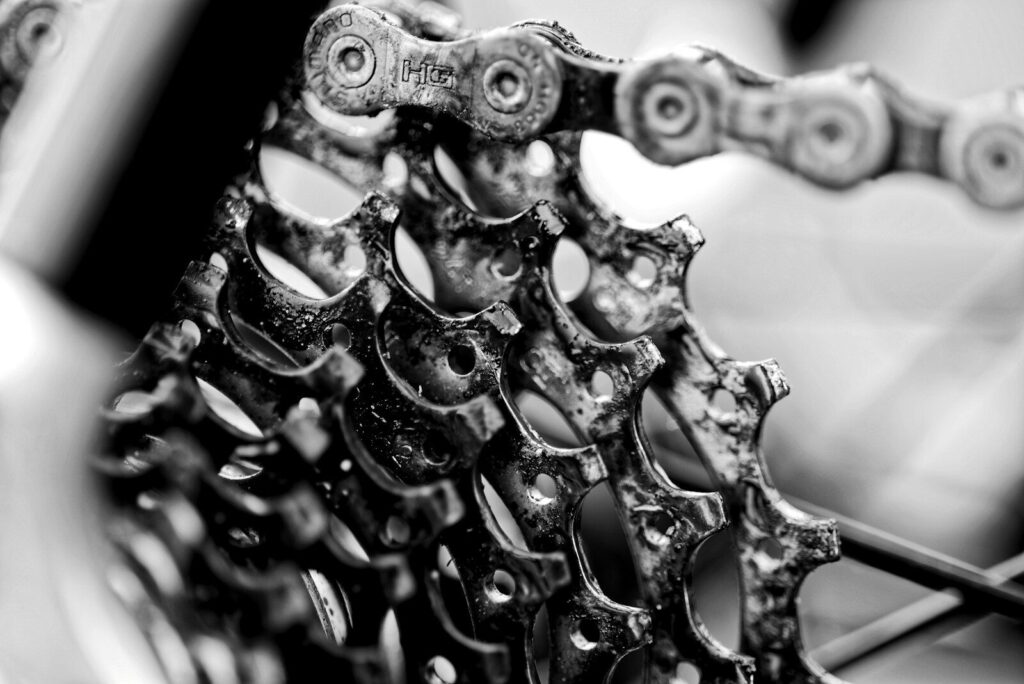
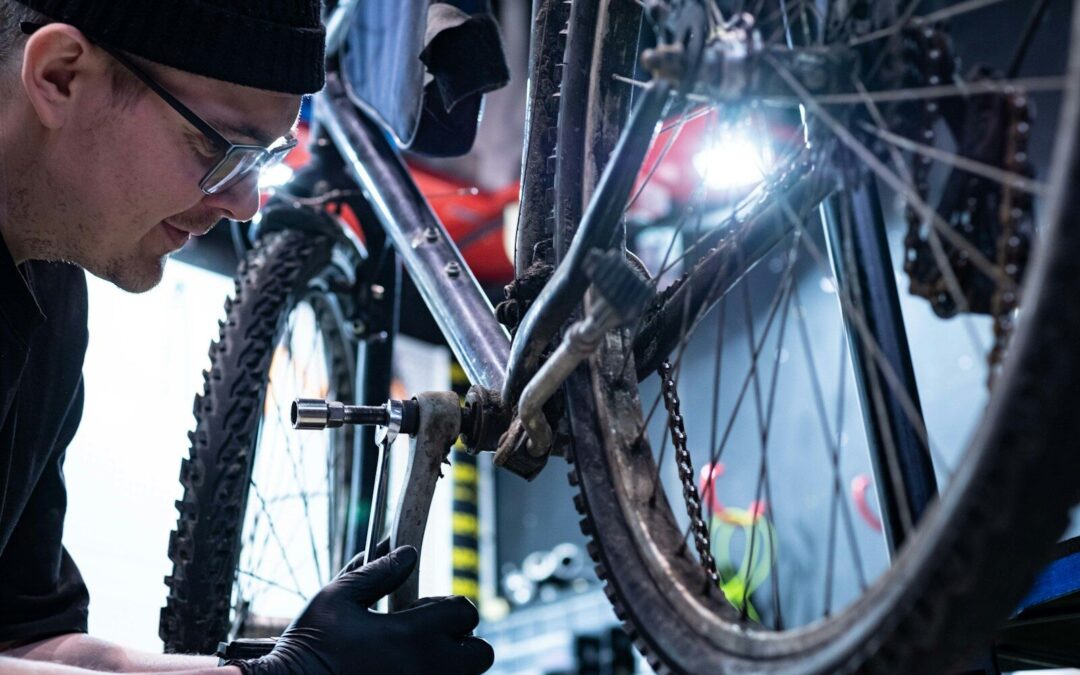
Photo by Fidel Fernando on Unsplash
Understanding Bike Chain Tension | Why It’s Important to Tighten a Bike Chain
Your bike chain is a crucial component of the drivetrain that transfers power from the pedals to the rear wheel, driving your movement. When the chain becomes loose, it can:
- Slip off the sprocket or rear dropouts, making pedaling ineffective.
- It causes unnecessary wear on bike components like the cassette and chainrings.
- Increase the risk of accidents during riding.
Ensuring the axle nut is properly tightened is essential to prevent the rear wheel from slipping during rides.
By fixing a loose chain and ensuring proper chain tension, you’ll enjoy smoother rides and prolong the lifespan of your bike parts.
Tools You’ll Need to Tighten a Bike Chain
Before you begin, gather these essential tools:
- Wrench or socket tool to adjust axle nuts or wheel nuts.
- Bike stand or an alternative way to lift the bike (such as flipping the bike upside down carefully onto its handlebars and saddle).
- Chain lubricant to ensure smooth operation after adjustment.
- Gloves (optional) to keep your hands clean.
- A rag for cleaning the chain if needed.
Pro Tip: If your bike has a quick-release lever, you won’t need a wrench for the axle nuts, as this feature allows easy wheel adjustments.
Preparing to Tighten the Chain
Before tightening the chain, it’s essential to prepare the bike and the necessary tools. This includes:
- Placing the bike in a stand or upside down to access the rear wheel
- Gathering the necessary tools, such as a socket wrench, chain breaker, and chain tool
- Ensuring the rear wheel is securely fastened to the bike frame
Step-by-Step Guide to Tighten Your Bike Chain
Step 1: Prepare Your Bike
Place the bike on a stable bike stand. If you don’t have a stand, carefully flip the bike upside down, resting it on its handlebars and saddle. Ensure the frame is stable and the rear tire is off the ground. This positioning will make it easier to adjust the chain and other components.
Step 2: Identify the Type of Bike
Different bikes have slightly different processes for tightening the chain:
Single Speed Bikes & Fixed Gear Bikes: These bikes do not have a rear derailleur, so the axle nuts or quick-release lever will need to be adjusted to increase chain tension.
Multi-Gear Bikes (With Rear Derailleur): While these bikes are more complex, the primary adjustment will involve ensuring the derailleur properly manages chain tension. A worn chain may also need attention.
Step 3: Loosening the Rear Wheel
To loosen the rear wheel, follow these steps:
- Locate the axle nuts that hold the rear wheel in place
- Use a socket wrench to loosen the axle nuts by turning them counterclockwise
- Remove any quick-release levers or nuts that may be holding the wheel in place
Step 3: Tightening the Chain on a Single Speed or Fixed Gear Bike
Step 3a: Loosen the Axle Nuts
Use your wrench to carefully loosen the axle nuts or quick release lever on the rear wheel. This will allow you to slide the rear tire backward and increase tension in the chain.
Step 3b: Adjust the Chain Tension
Pull the rear wheel backward gently, ensuring the chain becomes tighter. Be cautious of over-tightening, as the chain needs some slack to function smoothly. Aim for about half an inch of vertical movement when you press on the chain with your finger.
Step 3c: Align the Rear Wheel Straight
Before securing the axle nuts or quick-release lever, check that the rear wheel is aligned straight with the bike frame. Eyeball the positioning or use a measurement tool if needed. A misaligned wheel can lead to uneven tension on the chain.
Step 3d: Tighten the Axle Nuts
Once aligned, tighten the axle nuts securely using your wrench or lock the quick-release lever. Spin the rear wheel to ensure it rotates freely and the chain remains snug on the sprocket.
Step 4: Adjusting Chain Tension on Multi-Gear Bikes
For bikes with a rear derailleur:
- Inspect the derailleur’s spring tension. If the chain is loose, the derailleur might need an adjustment. Tightening the derailleur’s screws can often resolve the issue.
- If the chain is excessively worn or stretched, consider replacing it with a new chain to maintain optimal performance.
Step 5: Check Your Work
Spin the pedals and observe how the chain moves. The chain should remain snug on the chainrings and sprocket without slipping or making unusual noises.
Step 6: Apply Chain Lubricant
Once the chain is properly tightened, clean it with a rag and apply a fresh coat of chain lubricant. Lubrication reduces friction and wear, keeping your chain in peak condition for miles to come.
Step 8 (Optional): Inspect for Worn Chains or Components
If the chain is still loose after tightening, it may be necessary to inspect the chain and other components for wear. This includes:
- Checking the chain for signs of wear, such as rust or corrosion
- Inspecting the gears and other components for signs of wear or damage
- Considering replacing the chain or other components if necessary
Common Issues and Solutions
Here are some common issues and solutions related to bike chain tension:
- Loose Chain: A loose chain can cause poor shifting performance and increase the risk of the chain slipping off the gears. Solution: Tighten the chain by adjusting the rear derailleur or replacing the chain if necessary.
- Worn Chain: A worn chain can cause poor shifting performance and increase the risk of the chain breaking. Solution: Replace the chain with a new one.
- Poor Shifting Performance: Poor shifting performance can be caused by a variety of factors, including a loose chain or worn components. Solution: Adjust the rear derailleur or replace worn components as necessary.
- Chain Slap: Chain slap is a common issue that occurs when the chain is too loose and slaps against the frame or other components. Solution: Tighten the chain by adjusting the rear derailleur or replacing the chain if necessary.
Step 7 (Optional): Inspect for Worn Chains or Components
If you frequently experience chain issues, it might be time to measure the chain for wear. Over time, chains stretch and require replacement to avoid damaging other bike parts like the cassette or drive train.
Pro Tip: Watch a YouTube video for visual guidance if you’re tackling this task for the first time.
When to Visit a Bike Shop
While most riders can handle tightening a chain at home, some situations may require professional assistance. Consider visiting a bike shop if:
- Your chain tension issues persist even after adjustment.
- The chain or drivetrain components are worn and need replacing.
- You’re unsure about aligning the rear wheel or working with specific tools.
Local bike shops can also provide expert advice on maintaining your chain and other bike components, ensuring optimal performance and safety.
Tips for Preventing a Loose Chain
- Always check your chain tension before long rides, especially on single speed and fixed gear bikes.
- Keep your chain clean and lubricated to prevent excess wear and slack.
- Replace your chain regularly. A new chain every 1,000–2,000 miles (or sooner for frequent riders) can avoid major drivetrain issues.
- Ensure your rear axle and wheel nuts are properly tightened after adjustments.
Smooth Rides Start with a Tight Chain | How To Tighten A Bike Chain
A well-tensioned bike chain doesn’t just make your rides smooth—it keeps you safe and enhances the lifespan of your bike parts. Whether tightening a single speed bike chain or managing a rear derailleur, follow these simple steps to maintain your machine like a pro.
Still unsure? Don’t sweat it! Take your bike to a trusted local bike shop like Myrtle Beach Bicycles or copy the link to this guide next time you’re in need of help. And if you prefer thorough, real-time visuals, search your favorite YouTube tutorials.
Now, grab your wrench, and tighten things up—your next perfect ride awaits!